Blog
Tips To Increase Your Lash Speed

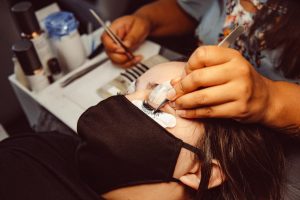
The faster you get at lash extensions, the more clients you can have. Many lash artists, especially beginners wish to increase their speed at application while still maintaining the quality of their eyelash extensions. However, it is not easy as you think! You should not only practice but also gain more tips and tricks from experts.
Who doesn’t want a little more money in their pocket? Continue reading to learn how to lash quicker while keeping your clients satisfied!
Lash Artists’ Average Industry Standard Timing
Before we begin, I’d want to discuss the typical timing for lashing complete sets and full fills. Not every lash artist can meet these “goal timings,” if you will, and some may finish either considerably faster or much slower than the average. However, it is useful to be aware of the normal time range in which most lash artists do a full set or a touch-up.
- 2-2.5 hours for the classic full set
- 1-1.25 hours for a standard 2-3 week fill (touch-up).
- Full Set Volume: 3-3.5 hours
- 1.5-2 hours for a 2-3 week fill (touch-up).
Tip 1: Avoid Excessive Brushing
Brushing the extensions is highly recommended as it helps lashes stay in the right place, however brushing every 5 extensions is definitely excessive. For a normal 2-hour complete set, I would brush through the extensions 5-6 times to line them up and identify any areas that needed additional care. Brush every time you replenish your glue drop (which should be every 15 minutes or so depending on your humidity level).
Tip 2: Use the map
Mapping can remove the guesswork from your setups by preventing you from wasting time determining what length should go there, and so on. You will save a lot of time by mapping out your lashes on the eye pad. Seriously, a lash map is one of the best suggestions I can provide to any lash artist, new or experienced! Not only will your speed increase, but your consistency will improve considerably as well. Once the customers have their eye pads on, you can begin sketching up your lash map. Keep track of where you’re lashing so you can quickly pick out the next lash, and so on. Don’t make the process too complicated. Always go for the simplest lash. There’s no need to go through layers of lashes.
Tip 3: Master your isolation skill
Isolation is the most difficult talent for lash artists to learn, yet it is also the most crucial. Don’t worry if the sound of isolation makes you worry. I guarantee that with time and practice, it will become natural and easy. In the meanwhile, I’ve got a few techniques for you that you can start using right now to feel much more secure when it comes to isolating your customers’ lashes.
My first piece of advice is to use TAPE. Tape is your best buddy for making isolation simpler and faster. Tape is effective for most individuals, but especially for those who have hooded eyelids.
But what about the lashes on the inner quarters? The challenging little ones that might be tough to isolate at first?
My recommendation is to treat the baby lashes! Take some time in the first five to ten minutes of creating a full set to lash those tiny lashes if necessary. My final piece of advice is to shift your view as needed. It is OK to softly move your client’s head back and forth to get a better view of their lashes.
???? Follow us to get more useful eyelash extension tips! Either way, check out our highest-quality lashes and big deals in our store now!

 Tiếng Việt